How to Sew a Buttonhole by Hand – Ultimate
What thread do you use for hand sewing buttonholes?
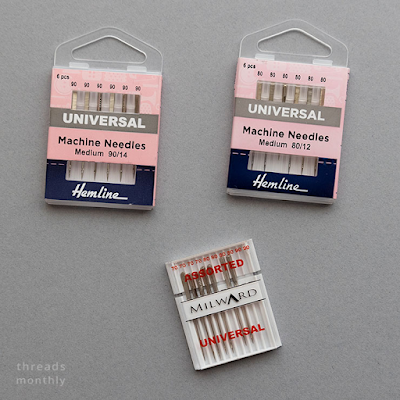
Traditionally, silk buttonhole twist thread (for example [1], [2], or [3]) is used for hand working buttonholes. It’s a thicker silk thread that’s very strong, and it creates a beautiful shiny appearance. It can be challenging to source based on your location, so if you, like me, can’t get your hands on it you can also use regular topstitching thread. I use Gütermann’s Top Stitch thread as it’s the same thickness as the buttonhole twist, and it looks really nice when sewn up.
Supplies:
- Gimp
- Gimp is a type of cord that consists of a wire or silk core wrapped in silk. It’s a thin but really strong, inflexible material. It is used to add extra strength to handsewn buttonholes so that they don’t stretch, grow and distort with use. It’s most commonly used when hand sewing buttonholes into tailored projects like jackets, coats, or waistcoats, so you can choose not to use it on lightweight garments like shirts, blouses, dresses, skirts, and so on.
- You can also make your own gimp substitute by making a four-cord gimp. To do so, take a length of buttonhole twist or topstitching thread that’s about 20 times as long as your finished buttonhole length. Fold it in half, and twist it as tightly as you can. Once you can’t twist it anymore before it bunches up, fold it in half again and let the two halves twist up. Give the loose ends a knot, run it through beeswax, and press it with a hot iron. Here’s a video tutorial showing you how it’s done.
- Another alternative is to use a single strand of heavyweight thread, such as upholstery thread.
- Thread
- Silk buttonhole twist or topstitching thread in a mathing or contrasting color to your fabric
- All-purpose polyester or cotton thread – I’d recommend you match the color either to your fabric or the buttonhole thread you’ll be using, so that the overcasting stitches blend in seamlessly.
- Cutting tools
- Small, sharp pair of scissors
- Buttonhole chisel or craft knife
- Leather punch (for keyhole buttonholes only)
- Hand sewing needle
- A thin, sharp needle in a small size will work for most fabrics and projects. I’d recommend starting with a size 8 Sharps hand sewing needle.
- Thimble
- I would highly recommend getting used to using a thimble when you’re hand sewing, especially on long repetitive hand sewing tasks like sewing buttonholes on a few layers of fabric. I have oddly shaped ring fingers and I have yet to find the perfect thimble for them, so this is a do as I say not as I do situation.
- Beeswax
- You will run the threads you’re using through beeswax and press them with a hot iron before using them to make the buttonhole stitches. The wax coating helps condition and strengthen the thread, and prevents tangles from forming.
- Iron
- The fabric of your choice
- Your button
- Interfacing
- Ruler
- Fabric marking tool of your choice (i.e. chalk or water-soluble marker)
How to mark, cut, and prepare the fabric for hand sewing a buttonhole
As with most sewing tasks, good preparation really matters for achieving good results when you’re hand sewing buttonholes. Here I’ll cover how to mark your fabric, how to cut it open, and a couple of ways you can prepare the area before you start working your buttonhole stitches.
Marking & drawing guidelines
Place the button where you would like it to sit on the fabric / on your project. Mark the center of the button by poking a marking tool through the holes of the button. This will be the starting point for your buttonhole.
Next, we’ll measure and mark the length of the buttonhole.
- If you’re using a thin button, simply put the edge of the button so that it touches the first mark you’ve made. Make a second mark on the other edge of the button, about 2 mm (less than ⅛”) away from the button.
- If you’re using a chunkier button, measure the diameter and thickness of the button. Add the two measurements together, and add another 2-3 mm (about ⅛”) to this measurement. Make a second mark that is this measurement apart from your first mark.
Draw a vertical line through the center of these two horizontal markings. You now have all the markings you need to cut your fabric open.
Cutting the fabric open
- For rectangle and round-end buttonholes
- Make a single, straight cut on the vertical line connecting the two short horizontal lines. Try to keep your cut clean and straight. You can use a buttonhole chisel, a craft knife, a razor, or a small and sharp pair of scissors to make this cut.
- For keyhole buttonholes
- Punch a small hole using a leather hole punch at one end of your buttonhole markings. Then, using small, sharp scissors cut straight through until your reach the second marking.
How to prepare the area
There are two techniques you can use to prepare the area where the buttonhole will go before you move on to the actual buttonhole stitching. One of them involves sewing a tiny rectangular frame around the hole (or around your markings before you’ve cut into the fabric) by hand or by using your sewing machine, about 2-33 mm (⅛”) away from the center line. The other involves overcasting the cut edges by hand to keep all the layers together and minimize the fraying of the materials.
You can combine the two, or choose to do one over the other. I would recommend you always do the overcasting, as it really helps with the next steps in both keeping the fraying at bay and forming a guideline you can follow. Here I’ll show you how you can do both techniques.
- Sewing a frame by hand or by machine:
- This method works best with rectangular and rounded end buttonholes. If you’re sewing the frame by hand, you can tailor the shape to fit a rectangular or a rounded end buttonhole. If you’re sewing it by machine, I’d recommend sticking to a rectangular buttonhole.
- By hand: Using all-purpose polyester or cotton thread and small running stitches, sew a frame around the vertical center line.
- By machine: Using a straight stitch with a length of 2 mm and all-purpose thread, sew a small rectangular frame around the vertical center line marking.
- Overcasting by hand
- 1) Take a length of all-purpose polyester or cotton thread that is about 18” (45 cm) long. Run it through some beeswax, and either press it with a hot dry iron or melt the wax on the thread using the heat of your hands. Thread it through a small, sharp needle like a size 8 Sharps.
- 2) Insert your needle into the right side of the fabric, about 1” (2.5 cm) away from the starting point of your buttonhole. Come back up through the hole. Leave a tail that’s approximately 2” (5 cm) long where you first inserted your needle.
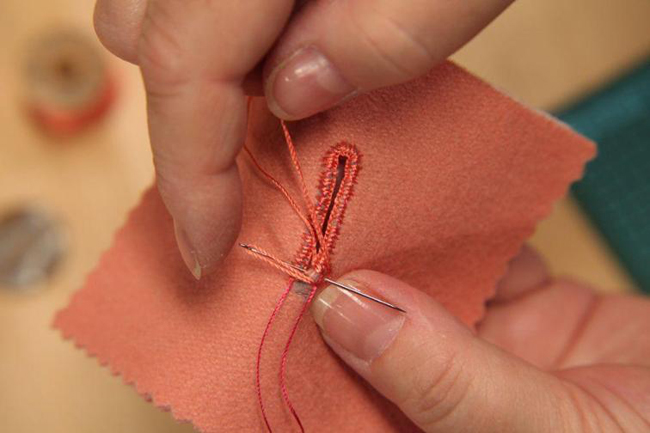
- 3) You will start stitching at the beginning of one of the long sides, moving toward the left. Insert your needle about 2 mm (less than ⅛”) away from the raw edge, going from the underside of the fabric to the top. Put your needle through the loop that is formed, and pull it through. Be careful not to tug on the thread too much, we don’t want to pucker or gather the edge. You want the thread to lie flat on the raw edge of the fabric.
- 4) Repeat this stitch every 3 mm (⅛”) or so, trying to keep an even 2 mm distance from the cut edge.
- For rectangular buttonholes, you can simply overcast the two long sides and leave it at that.
- For rounded-end buttonholes, start rounding off the short ends as you approach them. You can make your stitches closer together to get a better rounded shape here.
- For keyhole buttonholes, just focus on staying an even distance away from the cut or punched raw edges.
- 5) When you make your way around the entire hole and reach the second short end, pull both thread tails to the back and either snip them off or tie them together and trim them.
You will likely be working on at least two layers of fabric as you’re sewing the buttonhole. To prevent the layers from shifting, you can also do some basting stitches by hand around the area where the buttonhole will go. I’d recommend doing this before cutting the fabric open, so that the cut goes through the same spot in all the layers involved.

Commentaires
Enregistrer un commentaire